跳到内容
跳到内容 
Proper maintenance of plastic bulk containers not only ensures hygiene and safety during storage and transport, but also extends their service life and lowers overall logistics costs.
This guide explains how to clean, maintain, and use your plastic pallet boxes correctly to achieve long-term performance and reliability.
When Should You Clean Your Bulk Containers?
Regular cleaning keeps your bulk containers hygienic, odor-free, and structurally reliable. The following four situations clearly indicate when cleaning is necessary:
| Cleaning Timing | Cleaning Requirements |
| After Daily Use | Once goods are unloaded, if dust, debris, or stains are visible on the container surface, it should be cleaned immediately to prevent buildup that becomes difficult to remove later. |
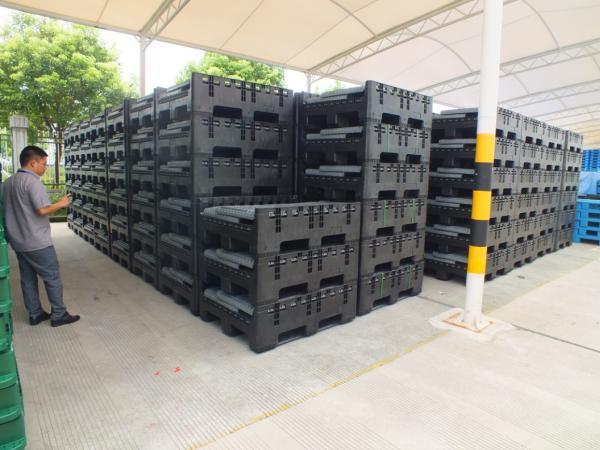
| Before Long-Term Storage | Whenever a container is going to be stored for an extended period, perform a full cleaning first. Even minor residues left inside can cause odor, mold, or material degradation during storage. |
| After Transporting Special Goods | Containers used for chemicals, oils, sauces, or other high-risk or odor-producing materials must be washed thoroughly right after unloading to avoid corrosion or contamination. |
| Regular Preventive Cleaning | Even if no visible dirt or odor exists, a general cleaning every one to two months is strongly recommended. This routine maintenance helps preserve surface integrity and ensures every container stays safe and ready for reuse. |
What Can You Use to Clean Your Bulk Containers?
Besides the usual towels, sponges, soft brooms, and long-handle nylon brushes, the following basic cleaning tools can help you remove different types of dirt more effectively:
- Scraper: When sticky or solid residues are attached to the container surface, a stainless-steel scraper works best. It’s durable, rust-resistant, and strong enough to remove thick residue without damaging the plastic.
- Vacuum Cleaner: For fine dust and small debris, a handheld or industrial vacuum is ideal. Use handheld vacuums for corners, holes, or narrow gaps, and industrial ones for larger surfaces or warehouse environments.
- Blower (Cold Air) or Industrial Fan: After washing, use a blow dryer on a cold-air setting for quick spot drying, or an industrial fan to speed up air circulation and dry the entire container evenly—especially useful when containers need to be reused quickly.
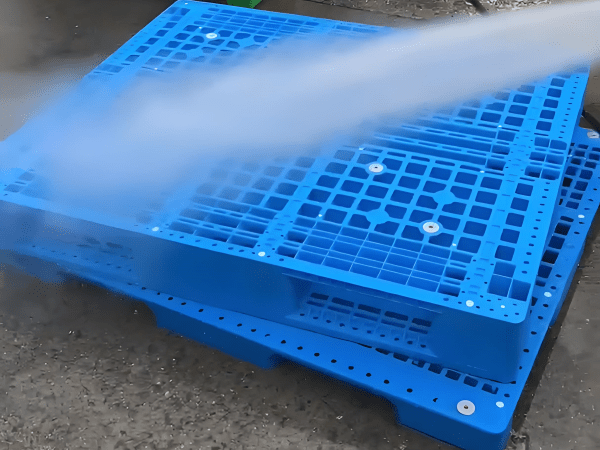
💡 Tip: If your bulk container is made of HDPE or PP (and not a single-use model), you may also use a high-pressure water gun with a pressure range of 20–50 bar for deep cleaning. Always confirm with your supplier first to ensure it matches your specific container type.
Recommended Cleaning Agents
Common mild household detergents are usually sufficient for cleaning bulk containers. Choose products that are neutral, low-foaming, and free of harsh chemicals.
Avoid using cleaners that contain any of the following, as they can damage the plastic or weaken the container over time:
- Strong oxidizers: e.g. chlorine bleach (sodium hypochlorite), hydrogen peroxide
- Strong acids: sulfuric acid, hydrochloric acid, nitric acid
- Strong alkalis: sodium hydroxide, potassium hydroxide
- Aromatic solvents: benzene, toluene, xylene
- Halogenated solvents: carbon tetrachloride, chloroform
How to Clean Plastic Bulk Bins Step-by-Step
Below is a simple, human-centered cleaning process — practical, efficient, and easy for anyone to follow in daily warehouse operations.

When cleaning, wear rubber or nitrile gloves to protect your hands from detergents and sharp residues, and put on safety goggles if you’re using high-pressure water or applying cleaning agents to prevent splashes from reaching your eyes.
Step 1: Pre-cleaning (5–15 minutes)
Start by opening the container door or lid. Use a hard-bristle plastic broom to sweep from the center of the bin toward the edges, removing debris and packaging scraps. Then use a stainless-steel scraper to collect the waste at the opening and discard it.
If there are hardened stains or sticky residues, gently scrape them off with a flexible plastic spatula held at a 45° angle — just enough pressure to remove the dirt without denting the wall. Finally, sweep the outside surfaces to remove dust and leaves.
Step 2: High-Pressure Rinse (5–15 minutes)
Set your high-pressure washer to a fan-shaped spray between 20–30 bar. Rinse the outside walls from top to bottom in steady vertical strokes. Switch to a stronger jet spray (30–50 bar) for corners, joints, or grooves where dirt collects.
Open the container and rinse the inside from top to bottom — back wall first, then sides, and finally the floor — keeping the spray on each area for about two seconds to flush away all residue.
Step 3: Apply Cleaning Solution (3–8 minutes)
Dilute a neutral detergent (1:10 with water) in a bucket. Dip a sponge or long-handle nylon brush until soaked but not dripping.
Start from the outer top section and wipe or brush in circular motions, working area by area. Inside the container, use long, even strokes from top to bottom. For oily or sticky stains, reapply the cleaning solution two or three times and let it rest briefly to loosen the buildup.
Step 4: Brushing (8–15 minutes)
Use a soft nylon brush to scrub all surfaces, beginning at the top and moving downward. Keep the strokes steady and rinse the brush often to prevent dirt buildup.
For stubborn marks, brush small circles over the spot until clean. Don’t forget hidden areas — use the brush tip to clean hinges, vent holes, and narrow grooves where residue may remain.
Step 5: Second Rinse (5–10 minutes)
Repeat the rinse using a fan spray of 25–35 bar pressure. Wash from top to bottom again until no foam or slippery residue remains.
Rinse the interior in the same order — back wall, sides, then floor — and finish by flushing the door seams to remove trapped detergent.
Step 6: Drying (10–60 minutes)
For natural drying, keep the lid or door open in a ventilated, shaded area to avoid UV aging. Check every 15 minutes and wipe corners to confirm dryness.
If time is limited, use an industrial fan about one meter away or a cold-air hair dryer, moving slowly across each surface until completely dry.
What to Check on Your Bulk Containers After Cleaning
After finishing the cleaning process, it’s the perfect moment to check the overall condition of your bulk containers. During washing, small cracks, loose parts, or deformation often become more visible.
We don’t recommend separating cleaning and inspection — combining both saves time and helps detect early damage before it affects daily operation.
Common Conditions You Should Check After Cleaning
- Small surface cracks
- Slight corner chips
- Loose handle or door
- Shallow dents
- Long or deep cracks
- Warped or sunken areas
- Broken parts
- Soft or brittle plastic
When to Handle It Yourself and When to Contact the Seller
Some minor issues can be handled directly, while others require professional support.
You can handle it yourself when:
- Minor cracks, dents, or loose fittings don’t affect sealing or load capacity.
- Damage is local and superficial, and cleaning or tightening is enough to restore stability.
- The container remains watertight and structurally sound after inspection.
You must contact the seller when:
- Through-wall cracks (length > 5 cm or 3 or more cracks) appear — these compromise the load-bearing structure.
- Severe deformation, softening, or brittleness occurs due to aging, heat exposure, or material defects.
- Broken doors or handles — usually molded into the body, requiring factory parts for safe repair.
- Reduced load capacity — e.g., a 500 kg-rated bin warps under 300 kg, suggesting structural or material issues.
- Unexplained corrosion or discoloration — may indicate raw material defects and should be reported.
Conclusion
At Enlightening Plast, every bulk container is backed by a 3 year warranty. If your container purchased from us shows any of the above damages within the warranty period, please send your purchase proof and a short damage video to our service team. We’ll review your case and respond within 24 hours, ensuring a fast and professional solution — replacement or repair — to keep your operations running smoothly.
By following the cleaning and inspection practices in this guide, you not only extend the lifespan of every container but also strengthen the reliability of your entire supply chain. Trust that Enlightening Plast stands behind every product you use — and every decision you make toward safer, smarter, and more sustainable logistics.
For related maintenance guidance, you may also read our detailed guide on How to Clean Plastic Pallets?