跳到内容
跳到内容 

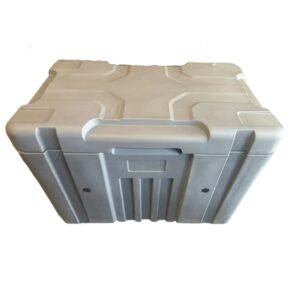
One reason customers choose Enlightening Pallet insulated containers is durability. With proper use, they are built to perform reliably for many years.
That said, even the most robust insulated container depends on correct cleaning and regular maintenance to protect its service life and insulation performance. Improper cleaning, rushed drying, or overlooked accessories often cause problems long before the shell itself wears out.
Below is the same set of methods we use internally, proven through repeated field use. They are practical, easy to follow, and suitable not only for our diy ice containers but for most high-quality insulated containers on the market.
How to Clean an Insulated Container Properly
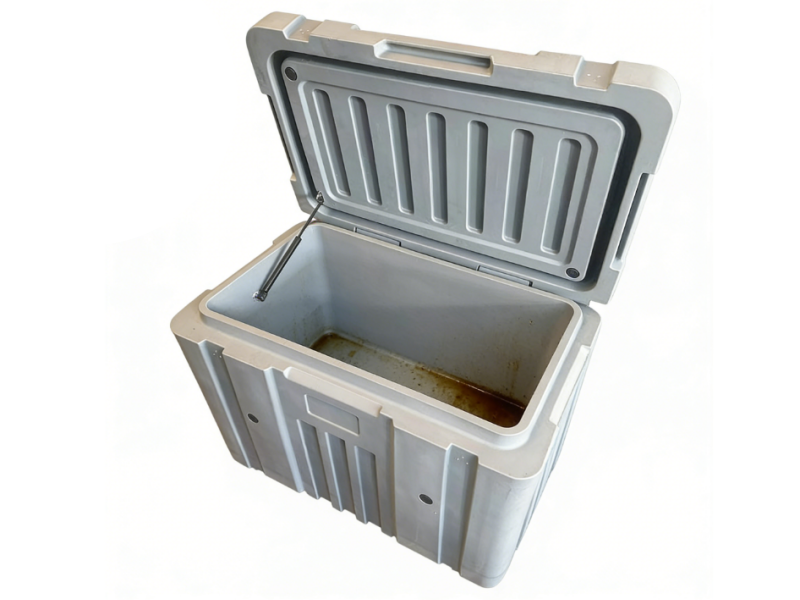
Before any cleaning begins, make sure all remaining dry ice has been fully removed from the container. Never clean a container that still contains dry ice. If needed, please refer to our separate guide How Do You Handle Dry Ice for safe handling instructions.
Based on real usage conditions, we recommend choosing one of the following three cleaning methods, depending on how heavily the container is soiled.
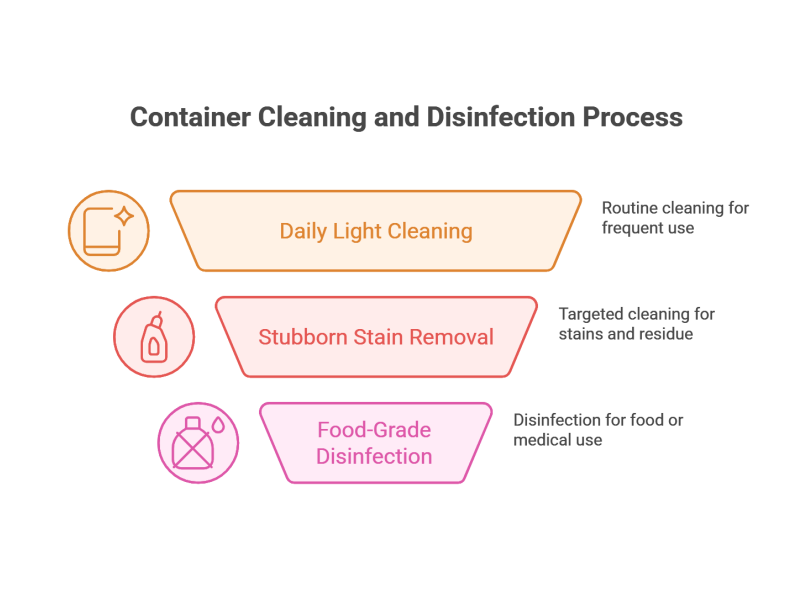
Daily Light Cleaning (Routine Use)
This method is suitable for containers used frequently with minimal contamination.
You will need two soft microfiber cloths, mild dish detergent, warm water, and a dry towel.
Begin by emptying the container completely and confirming that no dry ice remains. Open the lid and allow the container to ventilate for about 10 minutes, so the internal temperature can return close to room temperature. This step reduces condensation and makes cleaning easier.
Mix warm water with one drop of mild detergent. Using the first cloth, wipe gently in the following order:
Start inside the container, working from the bottom upward along the molded texture. Always wipe with the surface grain, not across it, to avoid micro-scratches.
Move to the lid, paying close attention to the gasket area and latch recesses where residue often hides.
Finish with the exterior, including handles and wheel mounts, removing surface dust only.
Next, rinse. Use the second cloth dampened with clean water and wipe all areas again to remove detergent residue.
Finally, dry everything thoroughly, especially the gasket and bottom corners. Leave the lid partially open and allow the container to air-dry for about 30 minutes to prevent trapped moisture and odors.
Stubborn Stains and Residue Cleaning
If the container shows oil stains, dried food residue, or light mold spots, a targeted approach works best.
Prepare a soft nylon brush, baking soda, food-grade white vinegar, a soft sponge, and a dry cloth.
- For oily areas, sprinkle baking soda directly onto the stain and let it sit for 5 minutes. Baking soda naturally absorbs grease.
- For dried residue, place a warm, damp sponge over the area for 10 minutes to soften buildup.
- For light mold spots, spray a mixture of white vinegar and warm water at a 1:2 ratio, then wait 3 minutes to inhibit growth.
Clean gently based on the stain type. Brush baking-soda-treated oil stains until they lift. Use the sponge for softened residue and a brush only in seams. Wipe mold spots with a soft cloth dampened with the vinegar mixture.
Once stains are removed, perform a full wipe-down using mild detergent and warm water. This removes any remaining baking soda or vinegar. Dry thoroughly and allow the container to ventilate for at least 1 hour.
Food-Grade or Medical-Grade Disinfection
For containers used in food transport or pharmaceutical storage, disinfection is essential.
You will need food-contact-approved disinfectant wipes, chlorine dioxide tablets (0.5 g per tablet), purified water, sterile gauze, and protective gloves.
Always complete daily cleaning first to remove visible dirt before disinfecting.
For quick disinfection, wipe all internal surfaces, the lid, and gasket twice using food-grade disinfectant wipes. Allow a 15-minute contact time, then wipe again with sterile gauze dampened with purified water.
For deeper disinfection, dissolve one chlorine dioxide tablet in 500 ml of water. Using sterile gauze, wipe all interior and exterior surfaces, including wheel joints if present. Allow 20 minutes for effective sterilization, then rinse thoroughly with purified water and dry completely.
After either method, open the lid and ventilate for 30 minutes until no disinfectant odor remains.
Although our insulated containers use a strong LLDPE outer shell, we recommend avoiding high-pressure water guns. Seals, latches, and joints can be damaged by excessive water force, even if the shell itself appears unaffected.
How to Maintain an Insulated Container After Cleaning
Once cleaning is complete, do not close the lid immediately. Place both the lid and container body in a shaded, ventilated area and allow the temperature to stabilize for 15–20 minutes. This prevents condensation and protects the insulation layer from moisture intrusion.
Now let’s look at key components that require routine attention.
1. The gasket is the first priority.
Our LLDPE insulated containers use rubber sealing gaskets that remain flexible with proper care.
After cleaning, apply a thin layer of food-grade silicone conditioner using a cotton swab. Wipe evenly and allow it to absorb. This prevents cracking, maintains elasticity, and reduces dust adhesion.
If you notice hairline cracks smaller than 1 mm, fill them with food-grade silicone sealant. Allow 24 hours to cure, lightly smooth with fine sandpaper, then reapply conditioner.
2. If your container is equipped with wheels, check them next.
Clean wheel axles weekly using a soft brush to remove hair or debris. Once a month, add one or two drops of silicone oil to each axle and rotate gently. Do not use machine oil, as it can contaminate food or medical environments.
If wheels show severe wear, noise, or misalignment, replace them with compatible LLDPE wheels rated for the container’s full load, typically 50–100 kg.
3. The insulation layer itself is usually polyurethane foam and should remain sealed.
If water enters due to improper cleaning, open the lid fully and place the container in a dry space at 25–30°C for at least 48 hours, rotating it every 12 hours.
If insulation performance drops noticeably after drying, the insulation layer should be replaced.
For surface damage, LLDPE allows practical on-site repair.
For shallow scratches under 0.5 mm, wet-sand lightly using 2000-grit sandpaper in circular motion. Apply LLDPE repair wax or food-grade plastic polish, buff until smooth, and wipe clean.
For small cracks up to 5 cm, clean and roughen the area, then heat evenly using a hot-air gun set to 200–220°C. Press LLDPE welding rod into the crack until fused. After cooling for two hours, sand smooth and apply plastic protectant.
How to Store an Insulated Container When Not in Use
Long-term storage requires preparation. LLDPE containers resist cold well, but prolonged pressure or neglect can cause deformation or gasket aging.
If the container has been unused for several months, place it on a flat surface and inspect for deformation. Minor distortion may recover after 24 hours at room temperature.
If no structural issues are found, vacuum interior corners and lid seams using a soft brush attachment. This prevents dust from migrating into the insulation.
Place activated charcoal and two lemon slices inside the container, close the lid, and wait 4 hours to neutralize odors. Then wipe all surfaces with 0.5% food-grade hydrogen peroxide, wait 15 minutes, rinse with purified water, and dry completely.
- Inspect the gasket carefully. Replace immediately if cracked. If intact, apply silicone conditioner twice, with a 10-minute interval, until elasticity is restored.
- If wheels feel stiff, clean and lubricate the axles.
- If insulation moisture is suspected, leave the container open in a ventilated 25°C environment for 48 hours, rotating once per day.
To confirm performance, we use two simple tests.
- First, place a cup of 80°C hot water inside, close the lid, and tape tissue along the lid seam. If the tissue remains dry after 10 minutes, the seal is effective.
- Second, place 500 g of dry ice inside, close the lid, and check after 24 hours. Normal sublimation loss should not exceed 30%. Excess loss indicates insulation degradation.
Once confirmed, applying a transparent PE protective film to high-wear exterior areas helps prevent future scratches.
Conclusión
Routine cleaning and correct maintenance significantly extend the life of an insulated container and preserve its thermal performance.
If you encounter damage or performance issues beyond field repair, please contact us with photos and videos of the container’s condition. Enlightening Pallet provides a 3-year product warranty, and our technical team is ready to support you with clear, practical solutions.