

El hielo seco se suele manipular de forma sencilla:
Colocas hielo seco dentro de un recipiente aislado → confirmas que el recipiente tiene drenaje y agujeros de ventilación pequeños → antes del envío, etiqueta claramente el contenedor con “Hielo seco” además de la advertencia de peligro requerida → durante el transporte, el hielo seco se sublima de forma natural.
Pero, ¿qué pasa si el envío está completo y aún sospechas que el hielo seco no se ha sublimado por completo, qué deberías hacer a continuación?
Como un fabricante de contenedores de hielo seco, sabemos que este es el paso en el que muchos equipos se vuelven cautelosos por una buena razón. Esta guía te brinda los preparativos esenciales, las prácticas de manejo paso a paso y las precauciones prácticas para manipular el hielo seco de manera responsable después de la entrega.
Riesgos del manejo inadecuado del hielo seco
Ahora que has visto el flujo de manejo típico, vale la pena detenerse por una razón clave: el hielo seco no es “solo frío”.” Cuando se maneja de forma casual, los riesgos aparecen rápido y pueden ser graves.
Generalmente vemos tres categorías de riesgo principales cuando el hielo seco se manipula de forma incorrecta:
1. Quemaduras por frío (lesiones por congelación)
Incluso unos pocos segundos de contacto directo pueden dañar el tejido de la piel y desencadenar muerte tisular localizada. El dolor a menudo dura más que una quemadura por calor, y la recuperación puede ser más lenta, especialmente si resultan afectadas las manos y las yemas de los dedos.
2. Riesgo de asfixia en áreas confinadas
El hielo seco es sólido CO₂. Al sublimarse, se expande como gas y puede rápidamente desplazar oxígeno en espacios cerrados o mal ventilados, como cabinas de vehículos, sótanos, cuartos fríos o bodegas. Las primeras señales de advertencia suelen ser mareos y falta de aliento, pero en concentraciones más altas puede provocar desmayo.
3. Peligros de Explosión e Impacto Físico
Si se coloca hielo seco en un recipiente sin orificios de ventilación, la presión aumenta continuamente a medida que continúa la sublimación. Esa acumulación de presión puede causar una ruptura o explosión súbita, convirtiendo tapas y fragmentos en proyectiles de alta velocidad que pueden resultar en laceraciones, fracturas o lesiones internas graves.
Con estos riesgos claramente definidos, el siguiente paso es práctico: cómo manipular el hielo seco sobrante de forma segura después del transporte, sin exponer a su equipo o instalación a un peligro evitable.
¿Cómo se maneja el hielo seco?
Teniendo en cuenta los riesgos (quemaduras por frío, acumulación de CO₂, peligros de presión), la medida más segura es prepara primero tu equipo de manipulación, así cada paso se mantiene controlado.
Preparación antes de manipular hielo seco
- Usa equipo de protección adecuado: Nunca manipule hielo seco con las manos desnudas. Use guantes aislantes gruesos (el aislamiento tipo goma funciona bien). Evita los guantes de punto fino; no bloquean el frío extremo. Las mangas largas y los pantalones largos añaden una capa de seguridad adicional.
- Usa gafas de seguridadEl hielo seco utilizado en el transporte de cadena de frío suele estar en bloques más grandes. Las gafas ayudan a proteger sus ojos de esquirlas, fragmentos y niebla fría de CO₂ irritación.
- Despeja el área de trabajoRetire los objetos frágiles y mantenga el área libre de niños, mascotas y personal no esencial.
- Trabaja en un espacio bien ventilado: El buen flujo de aire previene Acumulación de CO₂. Si es posible, utilice un ventilador cercano y evite manipular hielo seco en habitaciones interiores cerradas.
- Ten esto listoPreparar agua tibia (37–40°C) y un toalla limpia. Si ocurre una quemadura por frío, puedes calentar la piel suavemente y de inmediato. También ayuda a mantener un teléfono al alcance, para que puedas llamar a asistencia si algo no te parece correcto.
Una vez que estos fundamentos estén en su lugar, estará listo para la parte práctica—El método exacto paso a paso para desechar o terminar de sublimar de forma segura el hielo seco restante.
Si también necesitas una guía práctica para reducir la pérdida de hielo seco durante el almacenamiento, ver La mejor manera de almacenar hielo seco y ralentizar la sublimación para consejos sencillos sobre contenedores y hábitos de manejo que extiendan el tiempo de retención.
Paso a Paso: Manipulación Segura del Hielo Seco Después del Transporte
Paso 1 — Ventilar primero, luego abrir lentamente
Si está usando un contenedor aislado con hielo seco, empieza liberando la presión de forma controlada. Empieza liberando la presión de forma controlada. Desengancha solo un pestillo y dejar aproximadamente 1 cm de espacio así que El CO₂ puede ventilar gradualmente. Deja que el recipiente repose por 20–30 minutos. Una vez que estés seguro de que la presión ha disminuido, desengancha los cierres restantes y levanta la tapa lentamente, manteniendo tu cara y parte superior del cuerpo lejos de la abertura. Dale un momento para que niebla fría para despejar antes de llegar dentro.
Si el contenedor parece hinchado o abultado, haz no Ábrelo de golpe, apriétalo o fuerzalo. Colócalo dentro de un área bien ventilada y espera 10–15 minutos primero; la presión típicamente se reduce a medida que el gas continúa liberándose.
Paso 2: Decide: dejar que se sublime o transferirlo a un recipiente abierto
El enfoque más seguro depende de lo que quede.
Si el hielo seco restante es menos de 500 g, generalmente puedes guardarlo en el contenedor aislado original, pero no lo selles; déjalo abrir y colócalo en un bien ventilado ubicación.
Marcad el lugar claramente con una señal de advertencia sencilla para que nadie se acerque por costumbre.
Si el hielo seco restante es más de ~500 g, es mejor transferirlo para que la sublimación ocurra de forma controlada y visible. Ponte guantes aislantes y usar pinzas de metal o una pala de plástico resistente, manteniendo tu postura erguida para no inclinar la cabeza hacia la boca del contenedor. Mueve el hielo seco hacia un recipiente abierto, no sellado como una caja de cartón o una cubeta de plástico abierta.
Si estás lidiando con pellets o gránulos, a espumadera de mango largo de plástico o pala de boca ancha mantiene las manos más alejadas y reduce las salpicaduras. Mantenga los movimientos suave; si el hielo seco se ha apelmazado, palo con la pala suavemente—evite impactos agresivos que puedan hacer saltar fragmentos.
Aquí es el único lugar donde una lista realmente ayuda: estas son las “detenciones obligatorias” que previenen la mayoría de los incidentes:
- Nunca para agua o cualquier líquido sobre hielo seco.
- Nunca desechar el hielo seco en un drenar, inodoro, o fregadero.
- Nunca lanzarlo a un papeleras o cualquier recipiente sellado.
- Nunca ponlo en un compartimento del frigorífico/congelador o en otro electrodoméstico con cierre.
- Nunca manéjalo en un habitación sellada o cabina de vehículo cerrada sin circulación de aire.
Nuestro cliente del equipo de cadena de frío nos dijo que solían dejar las cajas de hielo seco devueltas en una pequeña sala de recepción, y el personal comenzó a reportar dolores de cabeza y mareos leves durante las horas punta. Después de que trasladaron el área de “hielo seco post-envío” a abrir la esquina de la bahía de carga y añadí un simple Señal de advertencia de CO₂ + flujo de aire ventilado, esos síntomas se detuvieron y su oficial de seguridad dejó de marcar el proceso en las auditorías.
Paso 3 — Deja que la sublimación termine, luego limpia e inspecciona
Como punto de referencia práctico, la mayoría pedacitos desaparecer en 1–2 horas. Bloques más grandes podría necesitar 4–6 horas, especialmente si el flujo de aire es débil. Una vez que el hielo seco se haya ido por completo, enjuaga el interior rápidamente con agua tibia, luego déjalo secar al natural antes de volver a usarlo. Si el recipiente parece un poco “deformado” después del frío, no te preocupes, solo haz una rápida verificación de seguridad: busca ¿alguna grieta, Asegúrate de que el la tapa todavía cierra bien, y confirmar el El área de ventilación no está dañada. Si ves una grieta o deformación severa, es más seguro reemplazar el recipiente.
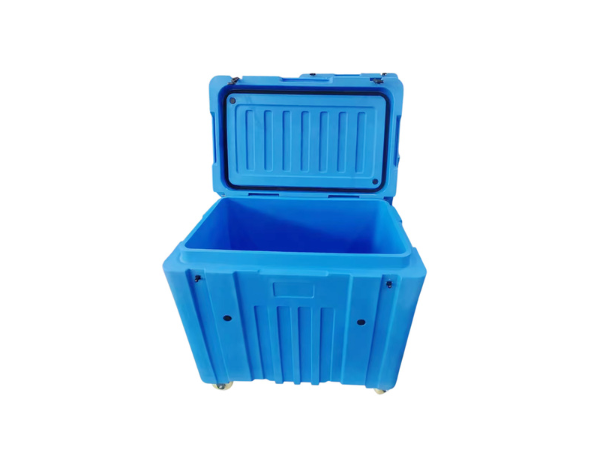
Si quieres seguir usando hielo seco (en lugar de dejar que se consuma), por favor, no uses una caja de plástico hermética. Elige una contenedor de hielo seco aislado con una salida de drenaje y pequeños orificios de ventilación en la tapa. Introduce el hielo seco restante, cierra la tapa y mantén el rejillas de ventilación despejadas, así que El CO₂ puede escapar y la presión no acumulará.
Un último recordatorio que ahorra problemas más adelante: asegúrate de que cualquiera que manipule hielo seco lo entienda tres básicos—sin contacto con las manos desnudas, buena ventilación, y almacenamiento sin sellar. Esta simple conciencia previene la mayoría de los incidentes.
Preguntas Frecuentes
¿Todavía puedo usar hielo seco que no se ha sublimado por completo?
Símientras se mantenga limpio y sin contaminar, y lo guardas en un recipiente aislado adecuado con orificios de ventilación en la tapa. Si ha entrado en contacto con derrames de comida, productos químicos o embalajes sucios, es más seguro dejar que termine de sublimarse en lugar de reutilizarlo.
¿Cuánto tiempo se puede almacenar el hielo seco como máximo?
Planificar realistamente para hasta unos 3 días. El hielo seco se sublimará sin parar; cada configuración de almacenamiento solo lo ralentiza, nunca lo detiene. En términos sencillos: más hielo seco + mejor aislamiento = mayor tiempo de retención.
¿El tipo de contenedor cambia la velocidad a la que el hielo seco se sublima?
Absolutamente. Un caja de plástico hermética puede parecer que ralentiza la sublimación, pero puede atrapar CO₂ y crear presión peligrosa—así que no se recomienda. A contenedor aislado de espuma con ventilaciones pequeñas en la tapa generalmente, es el mejor equilibrio: mantiene bien el frío y la presión es segura. Los recipientes abiertos como cajas o cubetas de plástico sublime más rápido porque el aire caliente llega más fácilmente al hielo seco.
Pensamientos finales
El hielo seco facilita mucho el envío y la conservación en cadena de frío, pero también exige respeto. No importa dónde lo manipules, un enfoque cuidadoso mantiene el trabajo sin problemas y a las personas seguras.
Aquí tienes el resumen simple de 3 líneas:
usa el equipo de protección adecuado, trabajar con ventilación fuerte, usar un contenedor aislado duradero para hielo seco (con ventilaciones en la tapa) en lugar de cualquier caja hermética.
Cuando te preparas bien y te mantienes atento a los pequeños detalles, el manejo del hielo seco se vuelve eficiente, predecible y seguro, sin estrés para tu equipo ni para tu operación.


